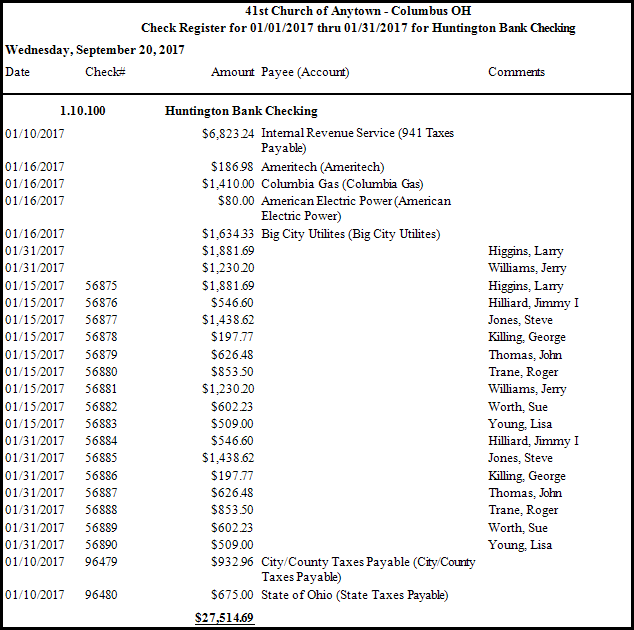
Check Register
The Check Register is a listing of all transactions where a check was issued during a specific time and for a specific Asset.
To view or print the Check Register:
- Click Reports/Export in the Button Bar at the top of the screen.
- Click the Transaction button.
- Click the Check Register option.
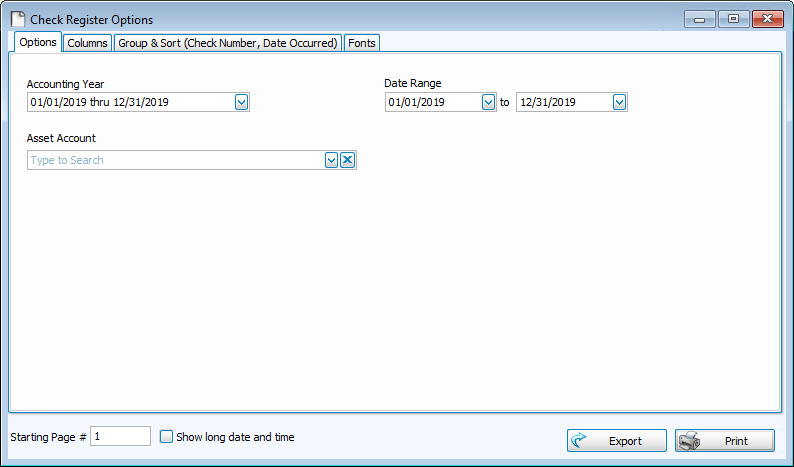
- Accounting Year —
Choose the desired year from the dropdown box. - Date Range —
Click the dropdown boxes and choose the beginning and ending dates. (If you wish to run a report for only one day, choose the same date from both Date Range boxes.) - Asset Account —
Click the dropdown box to choose the desired account from the list of Assets. - Choose any of the following tabs to apply additional settings:
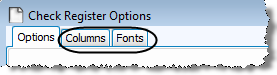
Check the Visible Columns list on the to see which columns are set to display.
Group & Sort (or Sort tab)
Arrange the list of transactions by up to three columns (sort fields). Click to change the order of each sort field to either Ascending or Descending order and separate the data into categorized groupings.
Change the size and style of the font that prints on the report.
Once you have made all of your selections, click Print to view a Print Preview and then proceed in sending the file to your printer. You can also Export most reports and/or Send via Email as a file to be used outside of Church Windows.